If your business relies on tensile testing laboratories for material quality assessments, you may have noticed how quickly the bills can add up. This is especially true if you've formed a long-term partnership with a testing lab. Often, these high costs come from unnecessary services or processes that you might not even require, leading to frustration and budget strain.
Understanding how to manage and minimize these expenses is a key consideration for businesses that rely on tensile testing as a key component of their operations. By implementing smart strategies, you can make sure that your testing needs are met without overspending, allowing you to focus on what matters most—delivering quality products. The purpose of this article is to explore 5 practical ways to reduce costs while maintaining the accuracy and reliability of your tensile testing results.
What is a Tensile Testing Laboratory?
A tensile testing laboratory is a facility equipped to evaluate materials' mechanical properties by applying controlled tension until failure. This process determines critical attributes such as tensile strength, yield strength, and elongation, which are necessary for assessing material performance under stress.
These laboratories use advanced equipment to conduct tests that verify that materials meet industry standards and are suitable for their intended applications. Beyond testing, they often handle specimen preparation. This makes certain that samples are correctly sized and shaped for accurate results. Additionally, they may offer services like failure analysis, material selection guidance, and quality control support, assisting businesses in delivering reliable and durable products to the market.
5 Best Practices to Reduce Tensile Testing Lab Expenses
While a number of factors influence the costs associated with tensile testing laboratories—such as the complexity of tests, frequency of testing, and specific industry requirements—there are 5 primary strategies that can help businesses minimize these expenses. By taking advantage of these approaches, companies can maintain high-quality testing standards while optimizing budgets.
Now let's look at these cost-saving methods:
1. Prioritize Key Testing Services
To manage expenses effectively, it's extremely important to identify and focus on the specific tensile test procedures that are required for your products. Begin by thoroughly understanding industry standards and regulatory requirements. Consult with material scientists or engineers to determine which tests are necessary and which may be redundant. By eliminating unnecessary testing, you can significantly reduce costs without compromising your products' quality and compliance.
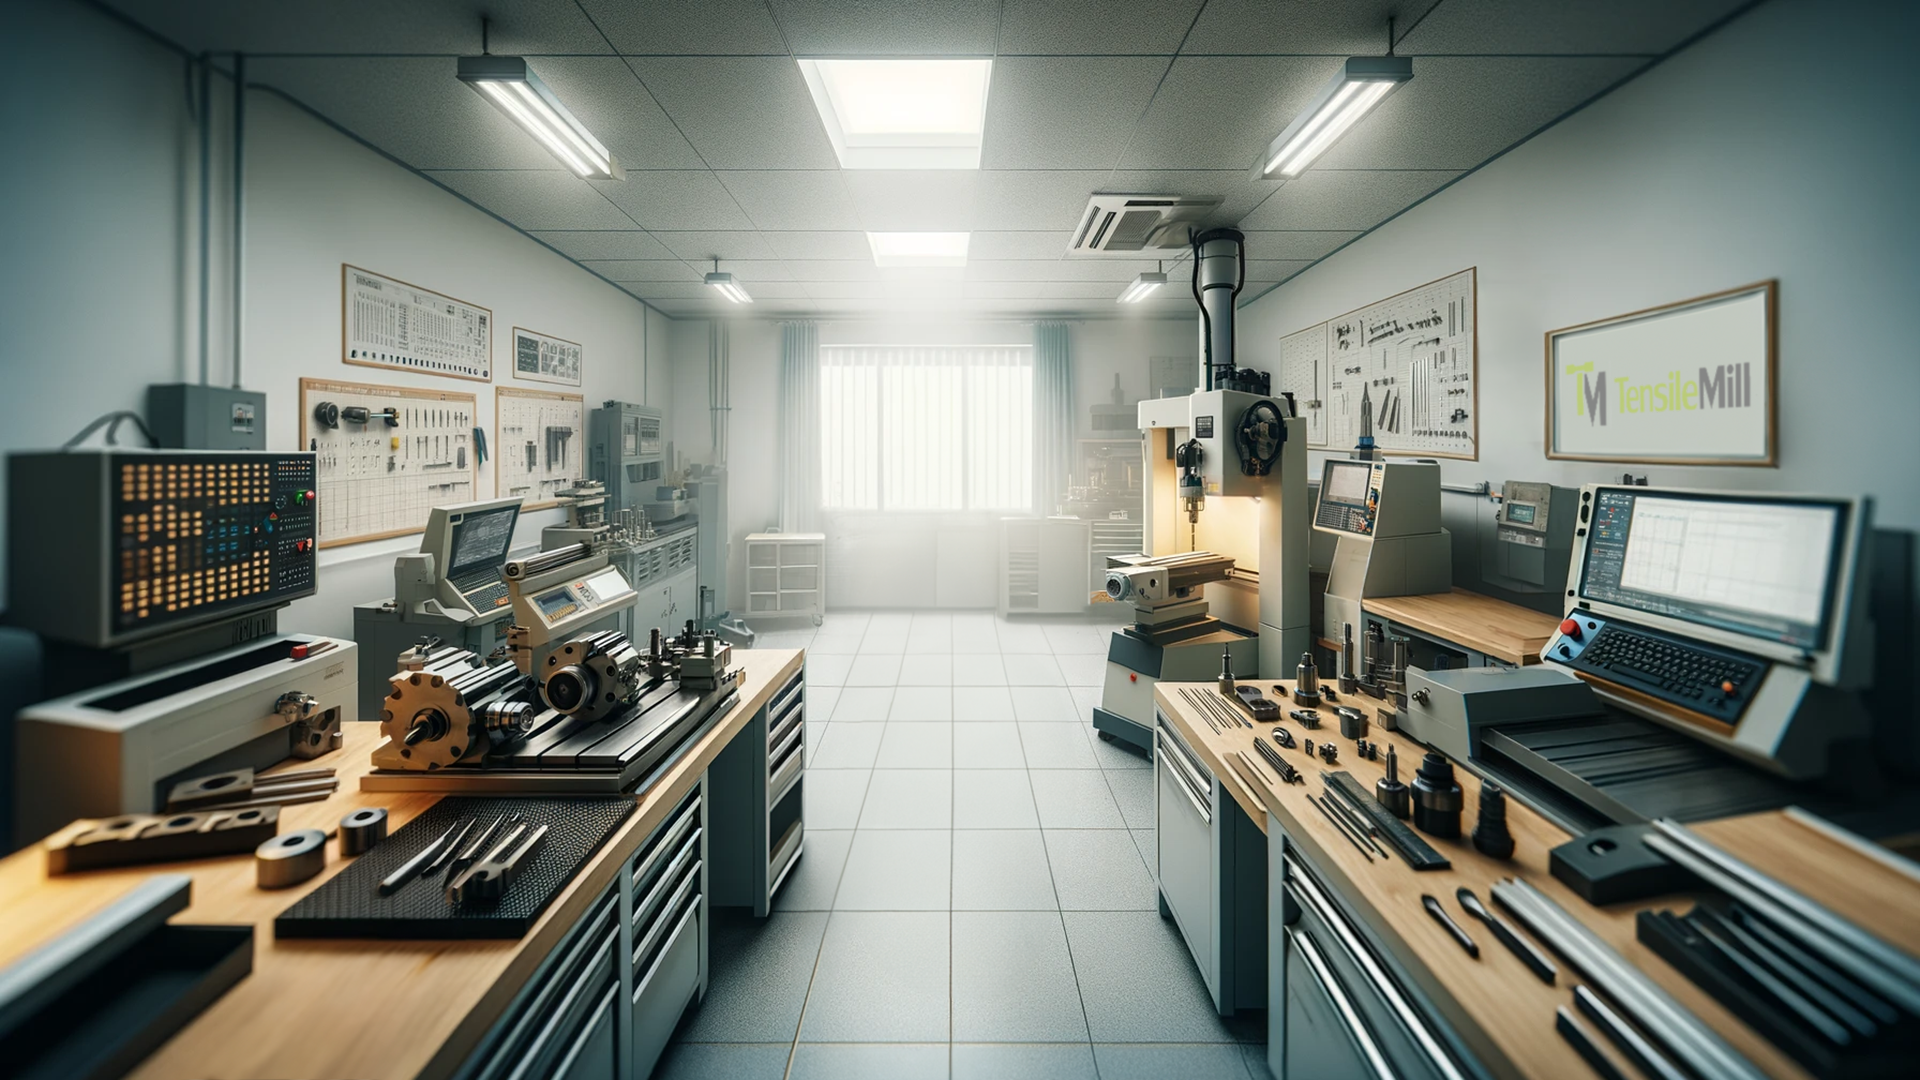
2. Establish an In-House Testing Facility
For businesses with frequent testing requirements, setting up an in-house tensile testing laboratory can be a cost-effective solution over time. While the initial investment in equipment and training may seem substantial, the long-term benefits often outweigh the upfront costs by reducing reliance on external labs. Key equipment to consider includes:
- CNC Machines: To prepare samples.
- Polishers: To achieve the required surface finish on samples.
- Universal Testing Machines (UTMs): Multifunctional devices capable of performing numerous tensile tests to assess material properties.
- Environmental Chambers: To conduct tests under specific temperature and humidity conditions, replicating real-world environments.
- Data Acquisition Systems: For accurate recording and analysis of test results.
Such an approach can lead to substantial savings in the long run by minimizing ongoing testing fees and providing greater control over the testing process. Therefore, setting up an in-house testing facility should be considered a top strategy for businesses aiming to optimize testing expenditures.
3. Partner with the Right Testing Laboratory
Forming a strategic partnership with a reputable tensile testing laboratory can save money. Begin by researching and comparing multiple labs to assess their pricing structures, services offered, and turnaround times. Engage in negotiations to secure volume-based discounts or long-term contracts with favorable terms. Additionally, selecting a lab in close proximity can reduce shipping costs and expedite testing. A well-chosen partnership will result in quality results while optimizing expenses.
For instance, a manufacturing company requiring regular tensile testing partnered with a local lab. By committing to a long-term contract and consolidating their testing needs, they secured a 15% discount on services and reduced sample transportation costs by 20%.
Choosing a lab requires assessing accreditations, such as ISO 17025, which indicates compliance with international testing standards. Additionally, testimonials from clients can provide insight into the lab's reliability and quality of service.
4. Prepare High-Quality Samples Before Submission
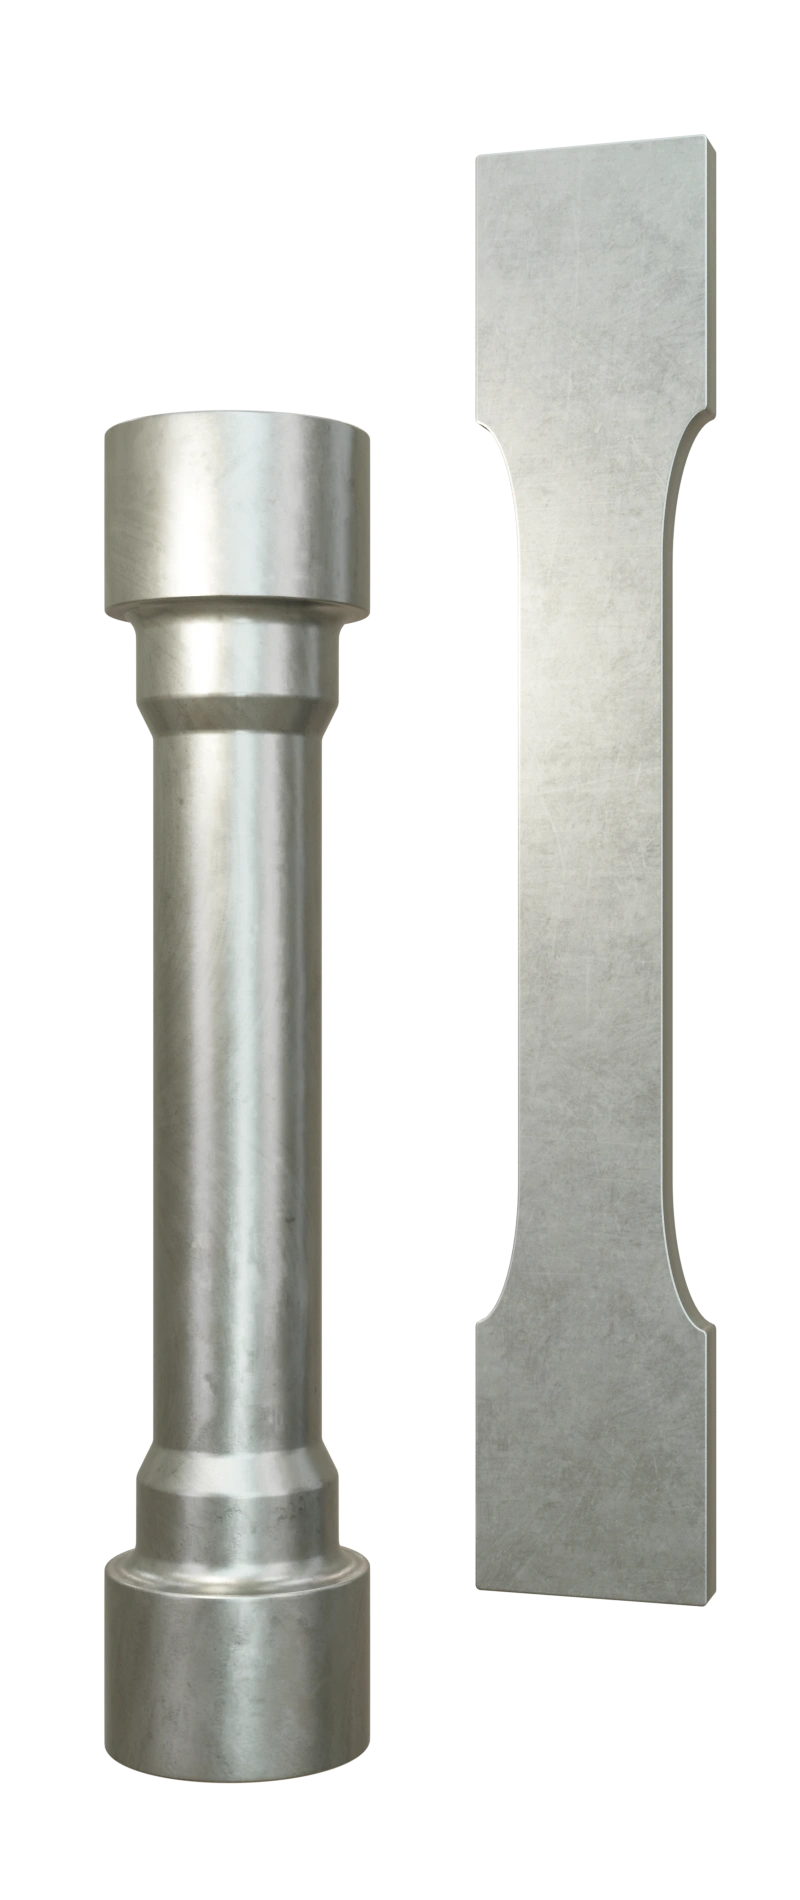
Proper sample preparation is crucial for accurate tensile testing and can also reduce costs. If possible, prepare samples in-house according to the laboratory's specifications in order to avoid additional fees associated with sample preparation. Make sure that specimens are correctly sized, shaped, and free of contaminants. Investing in basic preparation tools, such as cutting devices and surface finishers, allows for consistent and compliant samples, minimizing retesting and associated costs.
Consulting the lab's sample preparation guidelines guarantees compliance and avoids unnecessary delays. Implementing an internal review process to verify sample integrity before submission can further boost test result's accuracy and reduce the likelihood of incurring additional costs.
5. Optimize Testing Schedules and Batch Testing
Coordinating the submission of multiple samples for testing at the same time can save money. Batch testing reduces per-sample costs, as laboratories often offer discounts for larger quantities processed simultaneously. Plan your testing schedule to align with the lab's capacity, avoiding peak times that may incur higher fees. By organizing and consolidating your testing needs, you can take advantage of economies of scale, resulting in overall cost reductions.
Maintaining open communication with the lab can help identify optimal submission times, allowing you to benefit from their scheduling efficiencies. Regularly assessing your testing requirements can also reveal opportunities for batch processing, further reducing costs.
Searching for Quality Equipment for Tensile Testing Procedures?
If you're considering creating a comprehensive in-house tensile testing laboratory, evaluating equipment capabilities, or acquiring specific tools for specimen preparation, TensileMill CNC offers customized solutions to meet your needs. We are committed to providing high-quality equipment, maintenance services, and consumables to support tensile testing laboratories. Allow us to introduce some of our most popular products.
TensileMill CNC MINI – Compact Flat Tensile Specimen Preparation Machine
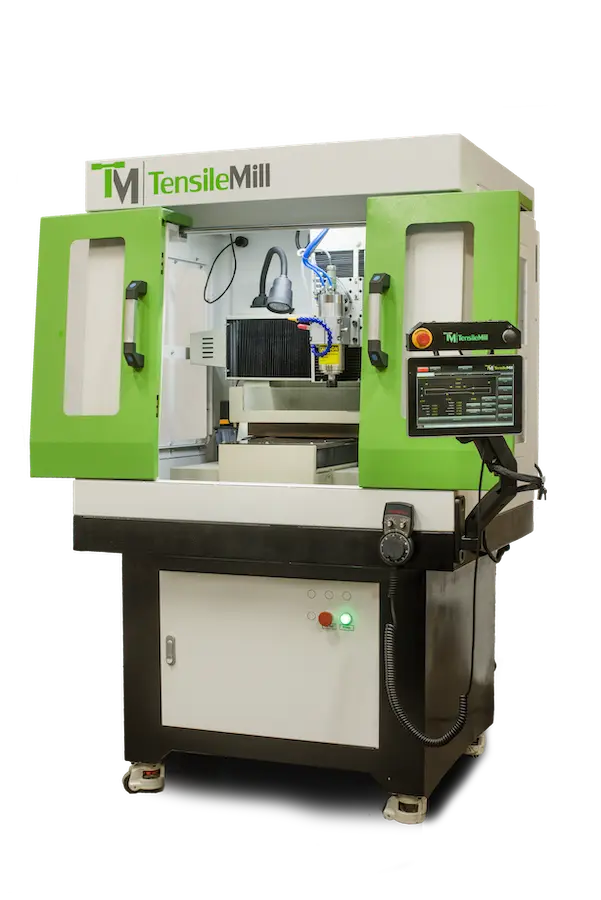
The TensileMill CNC MINI is a compact, high-speed machining center specifically created for efficient tensile specimen preparation. Despite its small footprint, this machine offers robust capabilities, making it a worthwhile investment for businesses aiming to reduce reliance on external testing services.
Equipped with a 24,000 RPM spindle and high-powered servos, the CNC MINI delivers precise and repeatable results, capable of working with an array of materials, including soft metals, hard alloys, and Inconel. Its user-friendly interface allows operators to input specimen dimensions based on ASTM, ISO, DIN, JIS, or other industry standards, thereby simplifying the preparation process.
By bringing tensile specimen preparation in-house with the CNC MINI, companies can significantly cut outsourcing costs, including service fees and transportation expenses. Additionally, the machine's efficiency reduces turnaround times, accelerating product development and quality control processes.
The CNC MINI's capability goes beyond tensile specimen preparation; it also functions as a full CNC machining center. This dual capability enables businesses to perform numerous machining tasks, further increasing the machine's value and contributing to overall operational savings.
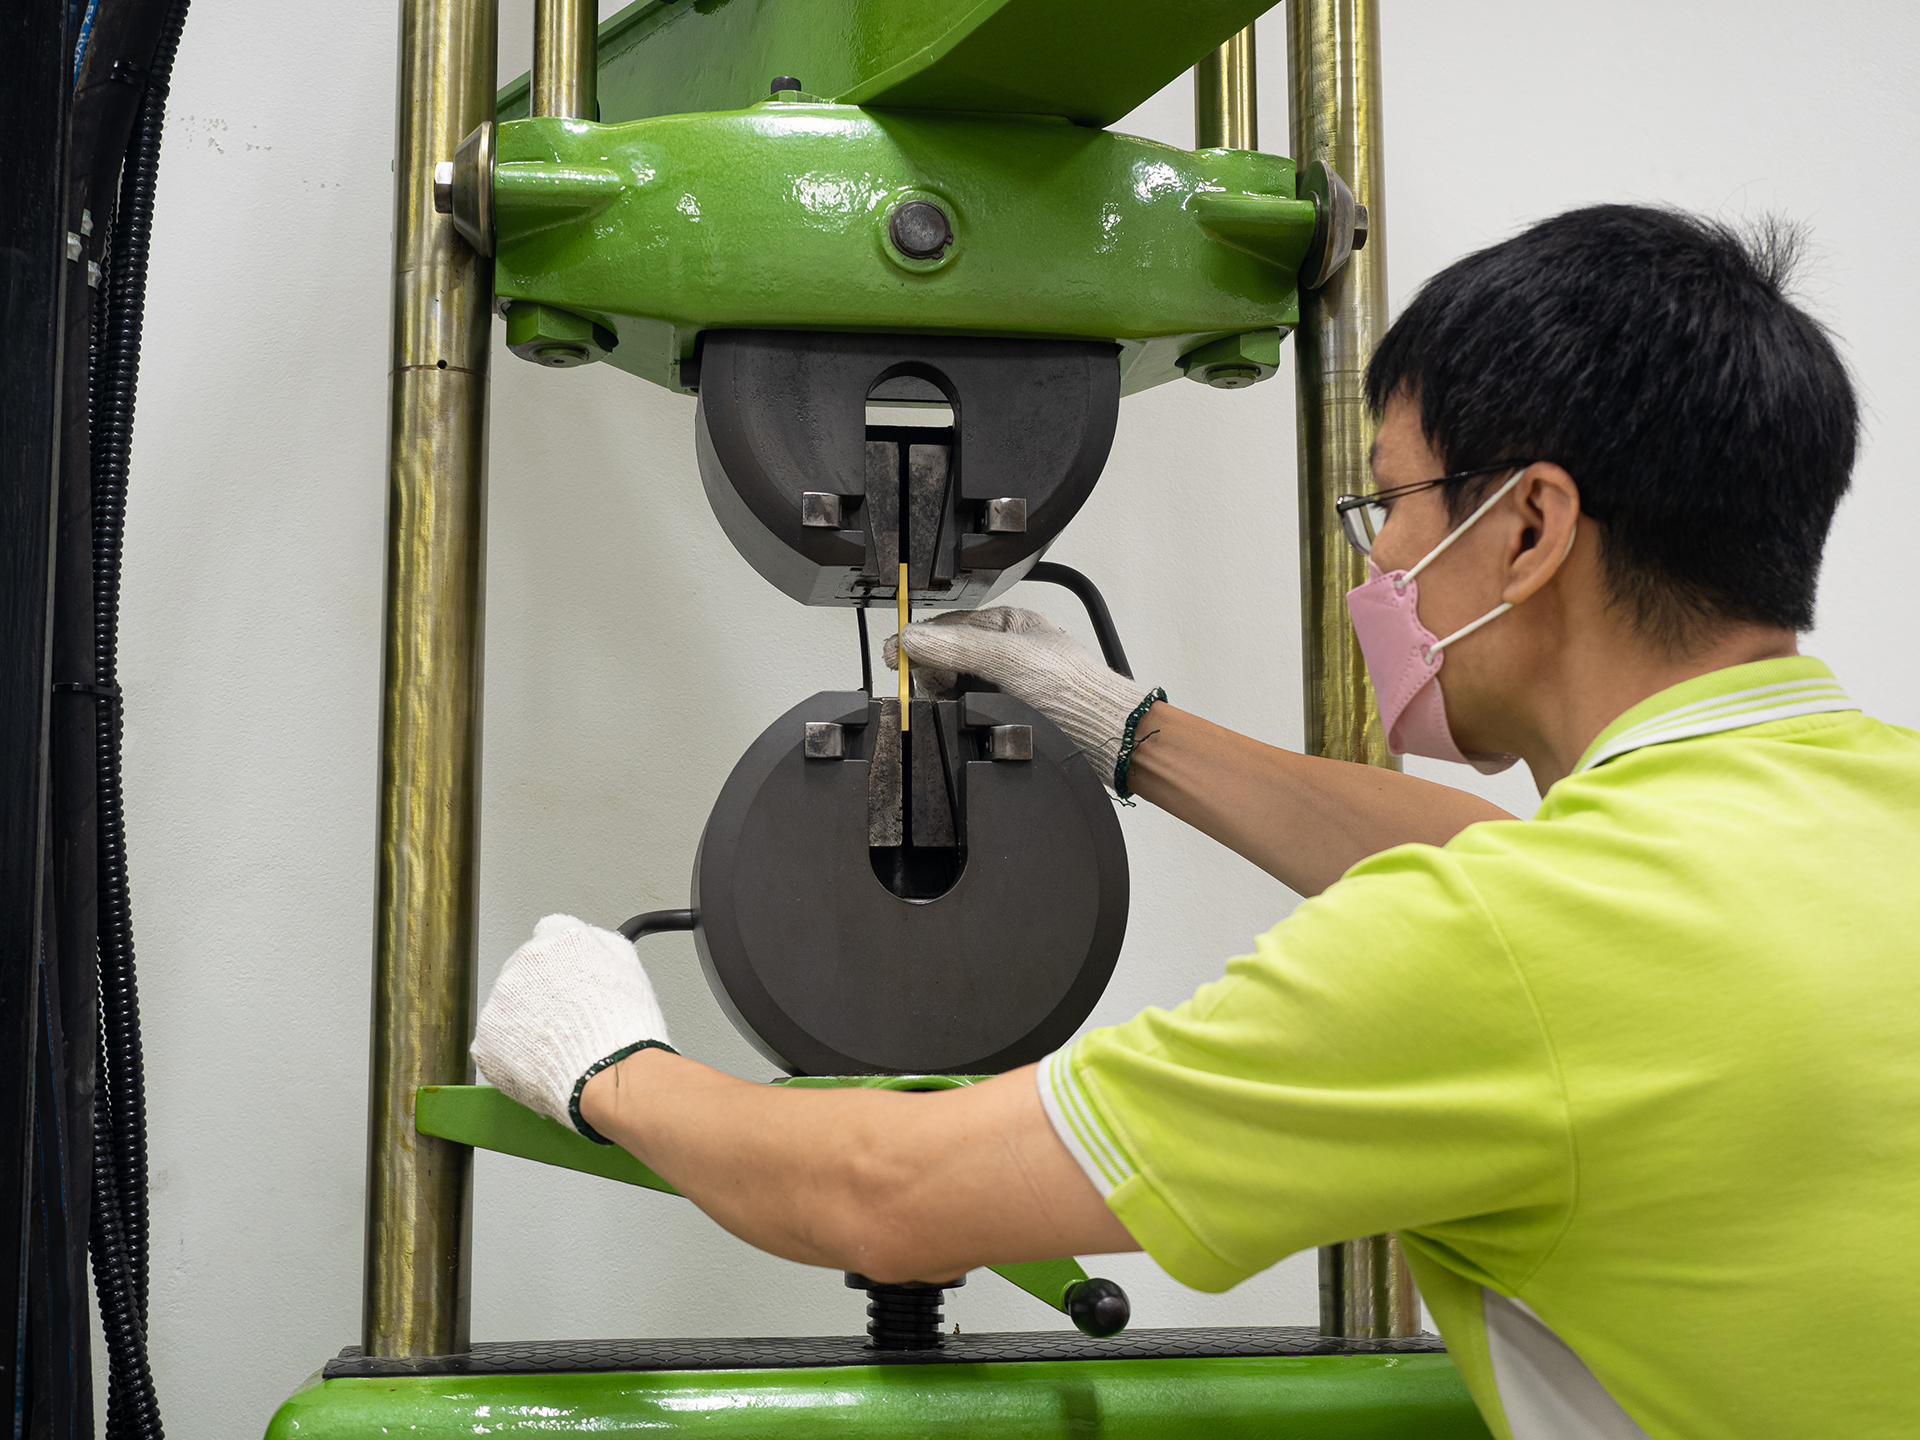
TM-SHM Class A Series – Servo Hydraulic Universal Testing System
The TM-SHM Class A Series is a robust servo hydraulic universal testing system designed to perform high-force mechanical tests on a range of materials. With capacities of 600kN and 1000kN, it accurately conducts tension, compression, shearing, and bending tests, maintaining a precision of ±0.5% of the reading value. The high level of accuracy guarantees the reliability of the results, thereby reducing the need for retesting and the associated costs.
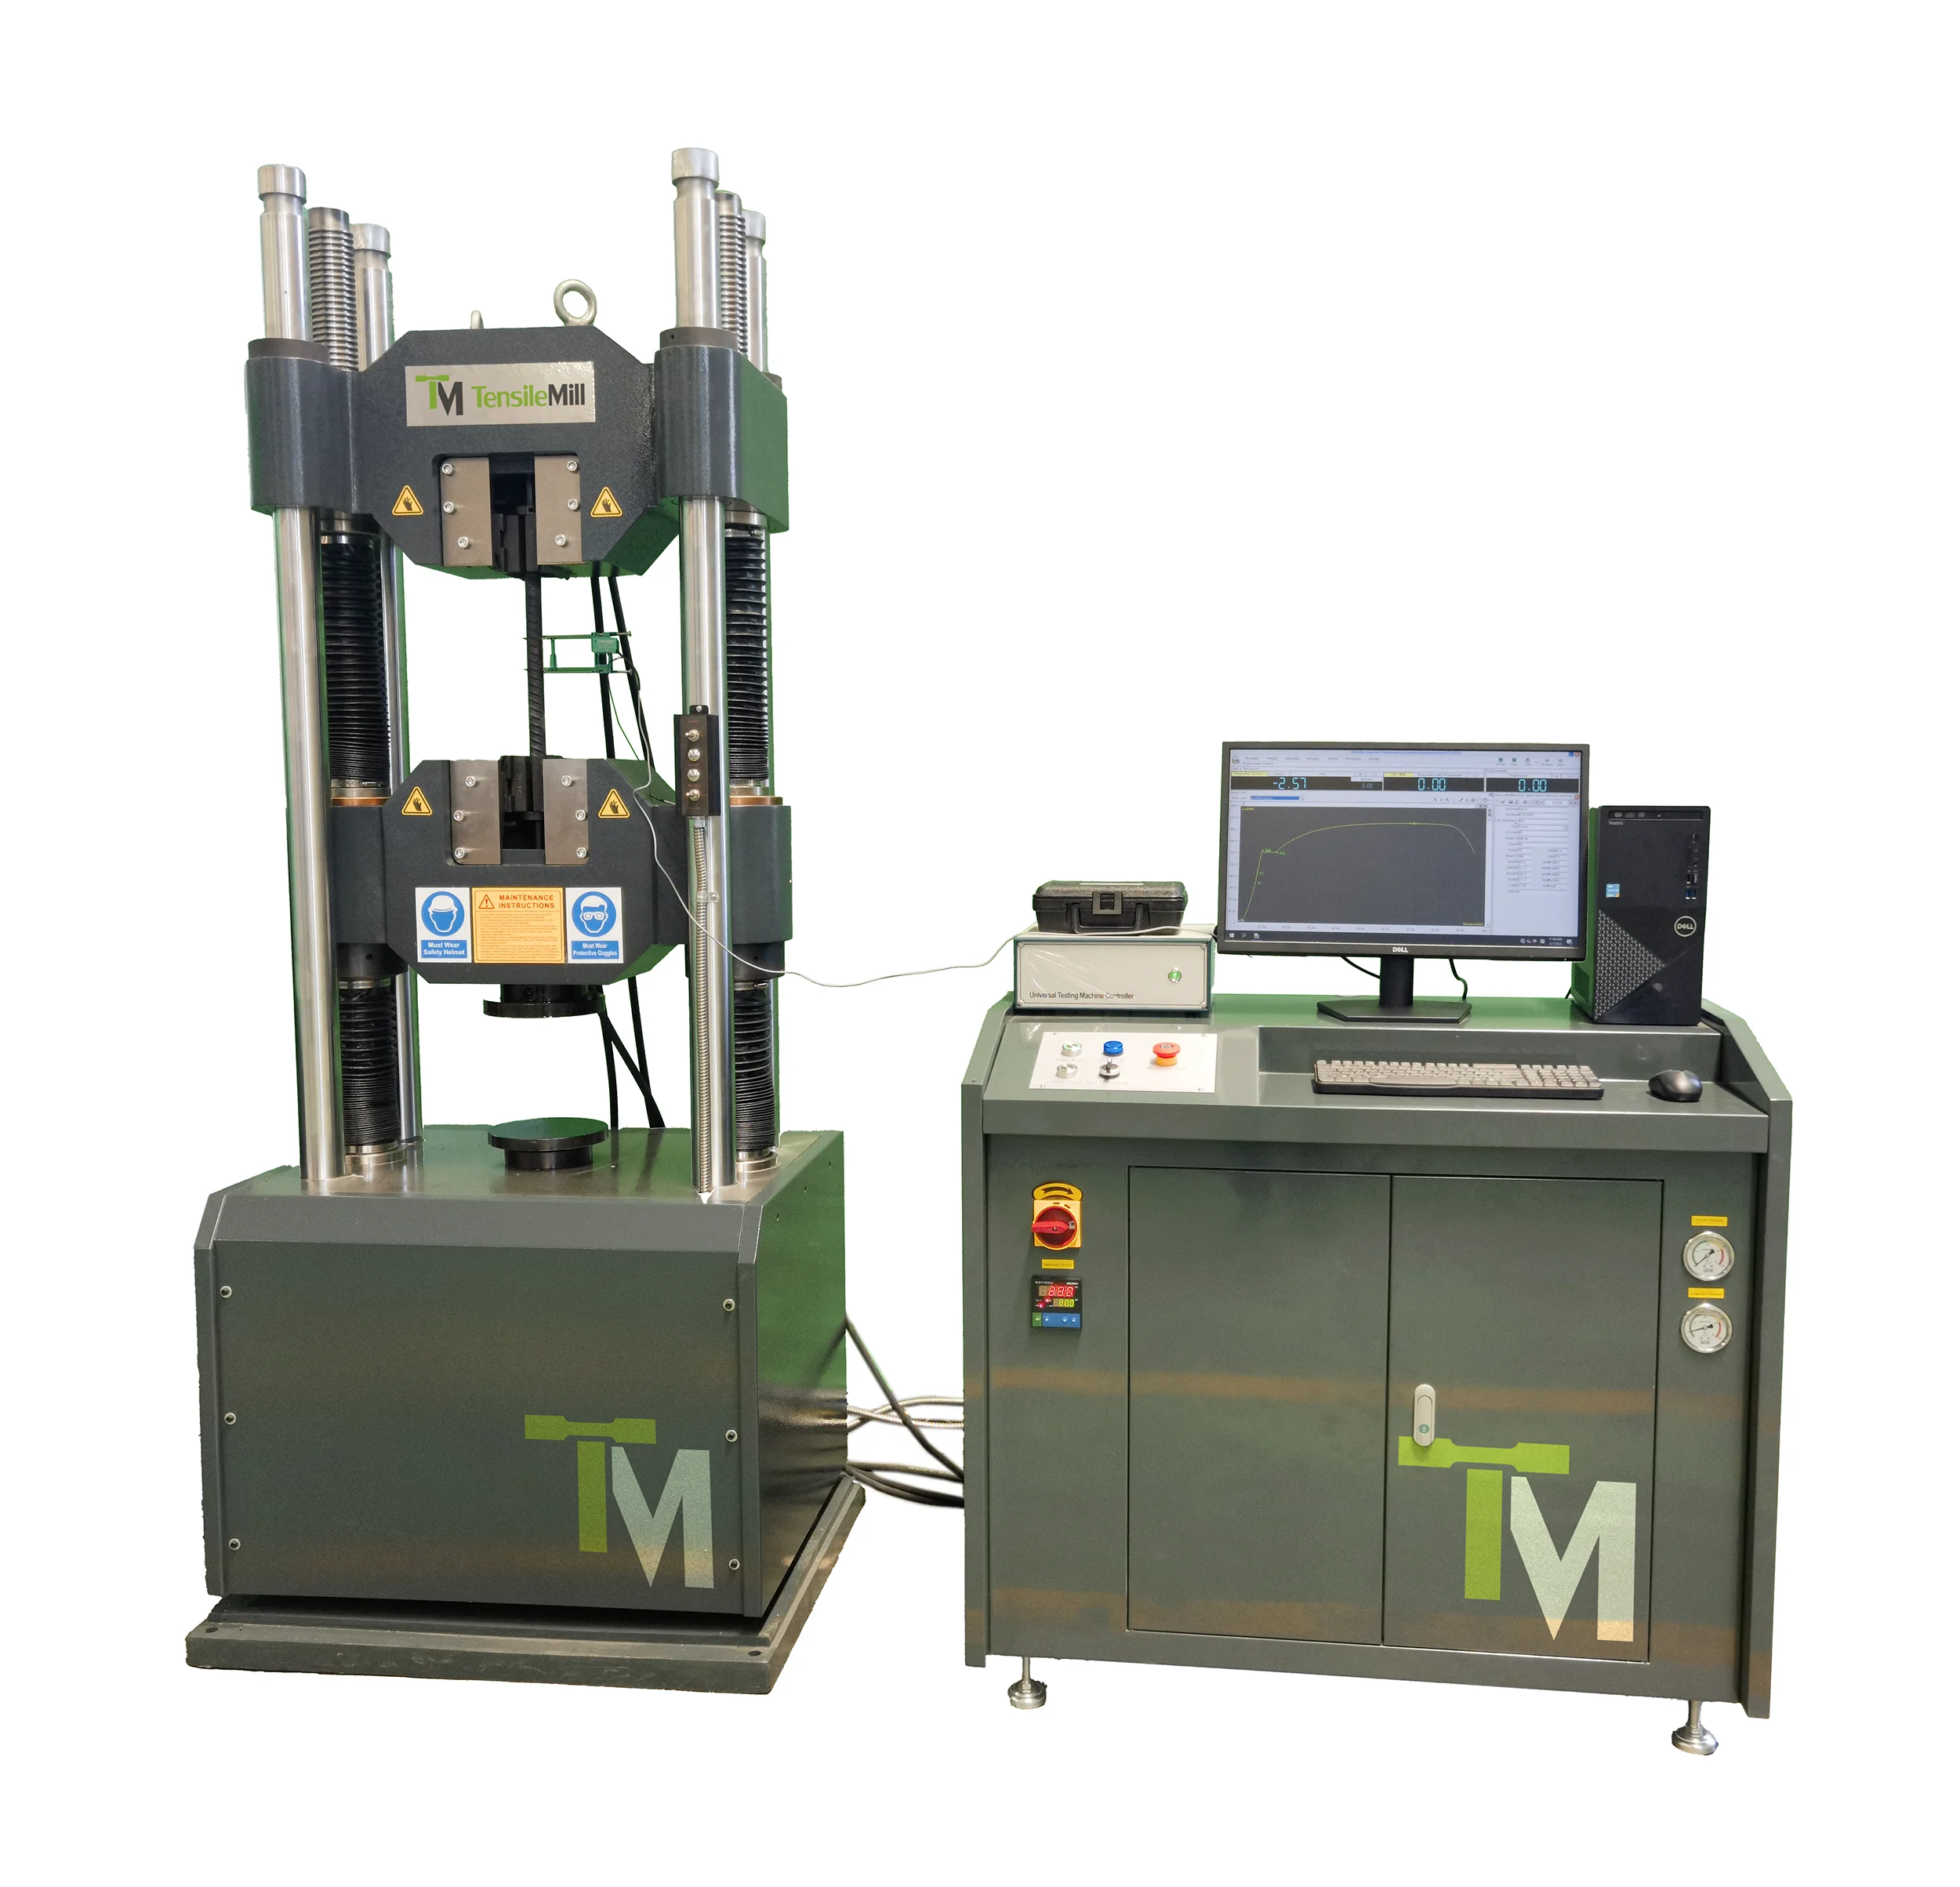
The system's load frame features a durable four-column and two-leading-screw structure, providing dual testing spaces: the upper area for tensile tests and the lower for compression and bending. This design maximizes testing efficiency and flexibility, allowing for a multitude of applications within a single machine.
Equipped with a high-precision load cell, the TM-SHM Class A Series delivers consistent and reliable measurements, a key component for maintaining quality control and compliance with industry standards. The hydraulic-operated tensile grip, constructed from high-strength alloy steel, provides secure specimen holding, minimizing slippage and deformation during tests.
Incorporating these systems into your operations will allow you to perform comprehensive material testing in-house and reduce the need to use external laboratories and associated expenses. Business owners who seek to expand their testing capabilities and improve their financial efficiency will benefit from such investment because it optimizes the testing process and offers long-term cost savings.
Maximizing Efficiency in Tensile Testing Operations
Effectively managing tensile testing expenses is a necessity for businesses aiming to maintain high-quality standards without overspending. By following strategies such as focusing on key testing services, establishing in-house testing facilities, forming strategic partnerships with reputable laboratories, assuring proper sample preparation, and optimizing testing schedules, companies can achieve significant cost savings. These approaches reduce expenses and provide greater control over the testing process, leading to more reliable and timely results.
For businesses considering creating their own testing laboratories and purchasing their own equipment, TensileMill CNC offers comprehensive solutions to meet your needs. We invite you to explore our selection of equipment on our website. If you have questions or wish to learn more, please contact us directly or request an online quote. We are here to help you optimize your tensile testing operations.